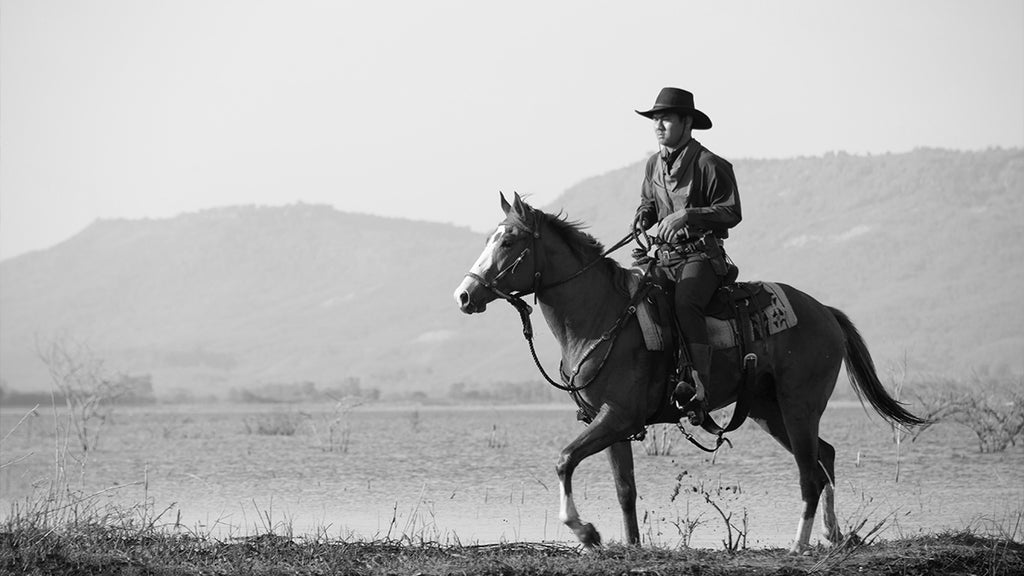

Forgotten Survival Crafts: Reviving Old-World Techniques
In our fast-paced digital age, the quiet and patient wisdom of ancient survival craft offers a grounding counterpoint.
These skills—once the backbone of daily life—have been overshadowed by the convenience of modern living. Yet they remain invaluable for those seeking to connect with traditional practices and self-reliance.
Here’s our step-by-step guide on how to breathe new life into these remarkable skills:

Navigation by Nature's Signs: Interpreting Earth’s Subtle Cues
Before compasses and GPS, travelers relied on environmental indicators to find their way. This skill involves a deep understanding of nature's language.
- Observe Plant Growth – In the Northern Hemisphere, moss usually grows on the northern side of trees where shade and moisture prevail. Take note of this trend to discern direction.
- See the Sun – Use the sun's position to establish direction. Remember, it rises in the east and sets in the west. At noon, it will be in the southern part of the sky in the Northern Hemisphere, and the northern part in the Southern Hemisphere.
- Study the Wind – Prevailing winds often follow a consistent pattern. Learn these patterns in your region to help determine direction.
- Watch Water Flow – Rivers and streams are natural guides. In many landscapes, they flow from higher to lower elevations and can lead to settlements or larger bodies of water.
The Craft of Scrying: Using Reflection for Prediction and Direction
Scrying involves using reflective surfaces like water, mirrors, or polished stones to gain insight. It was once considered a way to predict weather changes or find lost items.
- Fill a Bowl with Water – Use a dark bowl filled with water as a scrying tool. The reflections can help predict the weather by showing changes in air pressure or light patterns.
- Polish a Stone – Find a smooth, dark stone and polish it to a shine. Use it under moonlight to aid in night navigation by reflecting the moon and stars.
- Calm Your Mind – Scrying requires a relaxed and meditative state of mind. Take deep breaths and allow your focus to soften as you gaze into the reflective surface.

Star Navigation: The Celestial Map Above
Navigating by the stars is an art form that requires no instruments, just a clear night and knowledge passed down through generations.
- Learn the Constellations – Familiarize yourself with major constellations and their seasonal movements. In the Northern Hemisphere, for example, locating the North Star (Polaris) is key, as it holds a fixed position in the sky.
- Star Positioning – Understand the concept of azimuth and altitude. The azimuth is the compass direction from which the star is observed, and the altitude is the angle above the horizon.
- Celestial Navigation – Use the stars to determine direction. The stars rise in the east and set in the west. By knowing the time and the stars' positions, you can gauge direction.
[RELATED READ: Navigating Your World Without GPS]
Crafting Cordage from Plant Fibers: The Tensile Strength of Nature
The ability to make cordage from plant fibers was crucial for building, hunting, and tool-making. Here’s how you can do it:
- Identify and Harvest – Find suitable fibrous plants like nettles, dogbane, or yucca. Harvest long strands of the fibers from the stems or leaves.
- Prepare the Fibers – Lay the fibers out to dry slightly. Then, by hand or with a simple tool, separate the fibers from the woody parts of the plant.
- Twisting Technique – Take a bundle of fibers and twist them until they naturally begin to kink and loop. Hold the loop with one hand and use the other to twist each strand tightly, then twist them together in the opposite direction to form the cordage.
The Lost Art of Flintknapping: Shaping Tools from Stone
Creating tools from stone is a skill that demands precision and patience. Here are directions to give it a try:
- Select the Stone – Look for flint, chert, or obsidian. These stones fracture in a predictable pattern and can be shaped into sharp edges.
- Prepare Your Tools – You'll need a hard hammerstone for rough shaping and a soft billet, like antler or bone, for finer work.
- Safety First – Wear eye protection and gloves. Sharp flakes will fly off the stone.
- Striking Technique – Use the hammerstone to strike the edges of the stone at a downward angle to remove large flakes. Refine the edge with the softer billet by applying pressure to flake off smaller pieces.
- Shaping the Tool – Continue to remove flakes to form the desired shape, whether it’s an arrowhead, axe, or scraper.
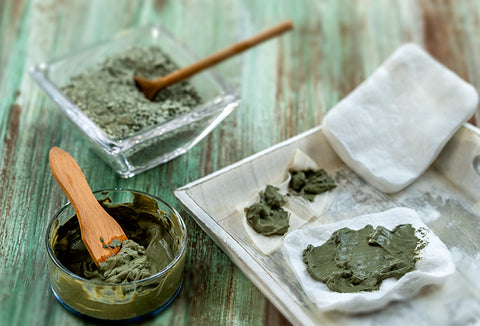
Herbal Poultices and Salves: Nature’s Healing Touch
The craft of making herbal remedies is as ancient as it is practical, utilizing the natural properties of plants for healing.
- Identify Healing Herbs – Research and identify local plants known for their medicinal properties, such as plantain for wound healing or yarrow for anti-inflammatory effects.
- Harvesting – Gather the leaves or flowers of the plants. It's best to do this in the morning after the dew has evaporated, but before the sun is too high.
- Poultice Preparation – Crush fresh herbs using a mortar and pestle to release their juices. For dried herbs, rehydrate them with a small amount of hot water to form a paste.
- Application – Spread the herb paste directly onto the skin or a clean cloth. Apply it to the affected area and secure with a bandage or wrap.
- Salve Creation – Infuse oils with dried herbs by heating them gently over several hours. Strain the mixture and combine it with melted beeswax to form a salve. Pour into containers and allow to set.
[RELATED READ: 10 Natural Pain Killers When SHTF]
Tanning Hides with Brain and Bark: A Forgotten Chemistry
The traditional method of tanning using brain and bark requires time and effort, but yields a durable and supple leather.
- Preparation – Skin the animal carefully to avoid tears. Scrape off flesh and fat from the hide.
- Bark Tannin Extraction – Collect bark from oak or hemlock trees. Soak the bark in water for several weeks to extract tannins.
- Brain Solution – If using the brain, mash it up and mix with water to create a slurry.
- Soaking – Submerge the hide in the tanning solution or brain mixture. The enzymes will break down and preserve the hide.
- Agitation – Regularly agitate the hide over several days to ensure even penetration of the tannins or brain matter.
- Rinsing and Drying – Once the hide is fully tanned, rinse it thoroughly and stretch it out to dry. Work the hide as it dries to maintain pliability.
- Softening – Once dried, soften the leather by pulling and working it over a smooth edge, like a wooden beam or rounded stone. This breaks down hard fibers and ensures the leather remains supple.
Reviving these ancient survival crafts is more than nostalgic; it's a vital reconnection to our ancestral roots. These crafts are a way to empower ourselves with self-sufficiency. By learning and practicing these skills, we’re honoring the past and enriching our future, ensuring these timeless techniques endure for generations to come.